Another Punch Art Dog!
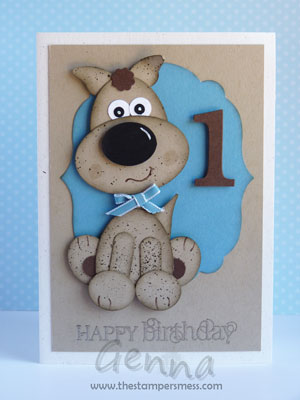
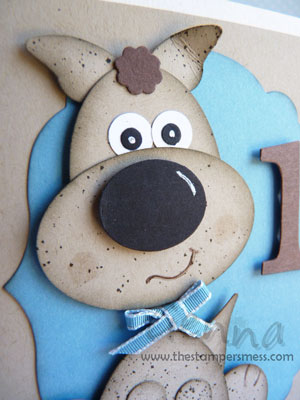
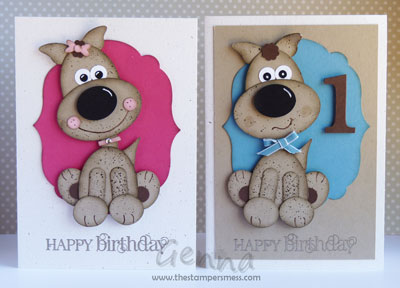
I taught a Punch Art class back in January featuring a little girl puppy. What I didn’t show you back then was that I’d made a boy version of the same puppy for my nephew’s 1st birthday card.
Here he is for his close up:
It was really simple to change him into a boy, just add a blue background, change the diamond collar for a blue ribbon, remove the bow from the hair, adjust the expression and take out the pink cheeks! That may sound like a lot of changes but all of them were really quick and easy. Take a look at them side by side to see the difference.
I love this dog and know I’ll be making more versions of him in the future. I wonder what I’ll need to do to make him look older?
Thanks for taking the time to visit ‘the Mess’. If you like what you see, leave me a comment.
Cheers
Genna
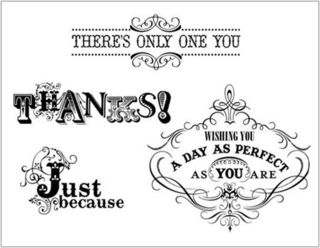
Sale-a-bration – Vintage Verses
OK, so it’s time to spotlight a Sale-a-braton stamp set that I think has been a little overlooked. It’s called Vintage Verses and is yours free with any order over $100!
Vintage Verses in Wood or Clear – FREE
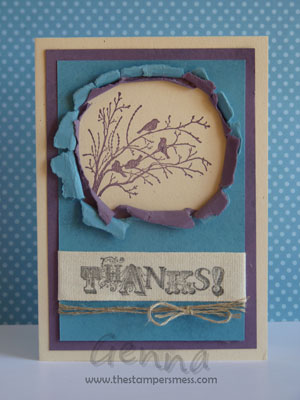
I featured the ‘Thanks’ sentiment on this ‘torn frame’ card recently:
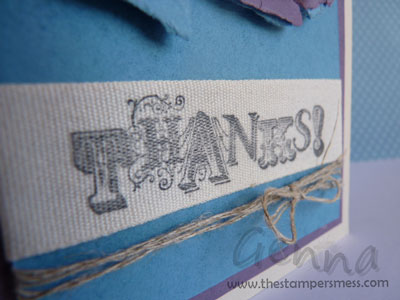
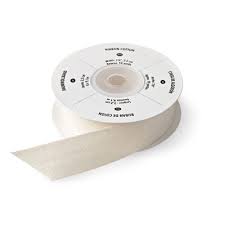
It was stamped in Black StazOn directly onto the 7/8″ Cotton Ribbon.
Cotton Ribbon – $13.95 for 9.1m
(Carried over from the Holiday Catalogue)
And here’s a closer look at that torn frame highlighting the beautiful image from Serene Silhouettes:
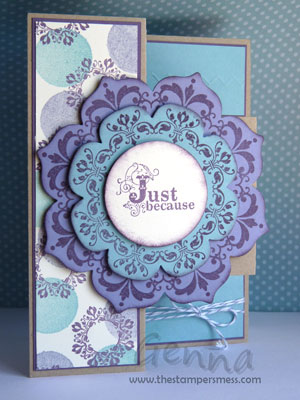
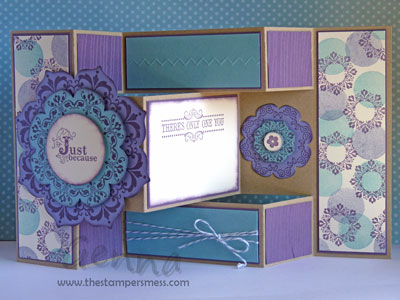
I also used Vintage Verses on one of this month’s projects for Stamp Club, coincidentally using the same colour scheme of Crumb Cake, Perfect Plum and Marina Mist! The ‘Just Because’ greeting seemed just right for the front…
…while the ‘There’s Only One You’ worked for my centre panel on the inside.
If you would like to get your hands on this set for FREE, all you need to do is place an order over $100 before the 22nd March and choose this as your freebie!
Thanks for looking. If you like what you see, please leave a comment.
Cheers
Genna
The Incredible Shrinking Stamps
I was looking for a project for an experienced group of crafters recently and thought I’d try something completely new – stamping on Shrink Plastic. My kids have some Shrinky Dinks – printed images that they can colour and then shrink – and they love them. I learnt from them that if you want a hole in your finished project you need to punch a great big one in the plastic before you heat it!
I’d picked up some sheets of black shrink plastic at a recent craft show so I stamped them with white Staz-On and used my heat tool to shrink it. In the past I’d put these type of things in the oven but it was quite exciting to watch it shrivel and shrink before my eyes – and it’s great to watch people’s faces when you demonstrate it too! At first it shrivels so much it looks ruined but if you stick with it you find that it flattens itself out and hardens into a perfectly shrunken version of what you started out with.
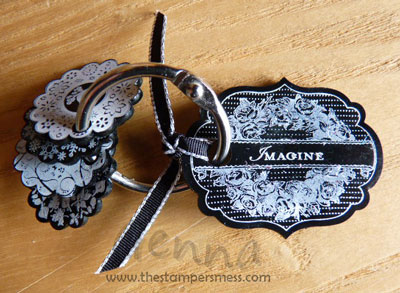
I was amazed at how well the stamping came out on the fully shrunken pieces. That ring is a standard key ring size!

The framelit in this photo was the size the plastic started out as so you can see quite how much smaller it gets! And much thicker and sturdier too!
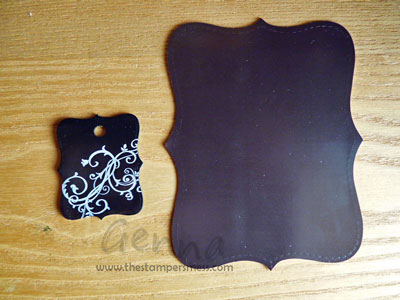
And here’s a different shape, with before and after examples!
Just let me know if you’d like me to demonstrate this at your next workshop!
Cheers
Genna
Christmas Cards Galore
With the headlong rush into Christmas I haven’t had a chance to share these Christmas projects with you. Before it’s too late I thought I’d bundle them together in this post for you to see:
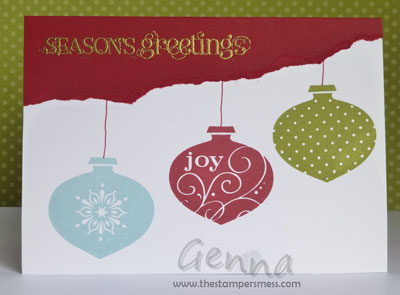
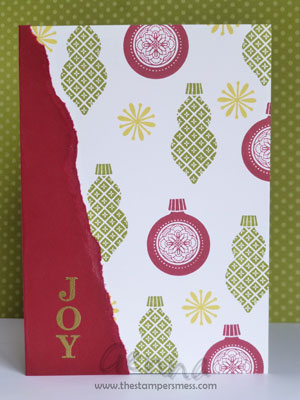
First, there’s some ‘no-cut’ cards. These are quick and easy and really great for making loads in a short space of time:
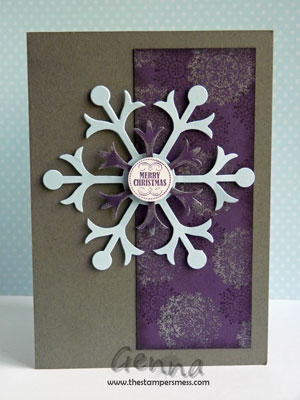
Then there are a couple from my launch, using the lovely Snow Flurry die from the Holiday Catalogue – hurry this is only available until the end of January! I made the same card twice in two colour schemes. In Basic Gray…
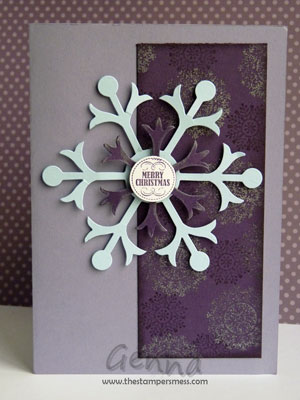
And in Wisteria Wonder…
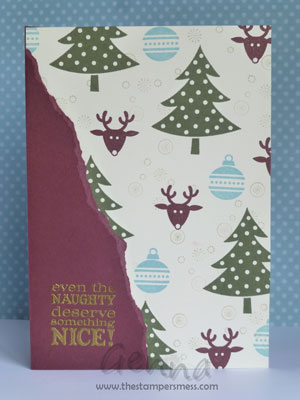
And finally, here’s a quick card I made by messing about with some left-over scraps from the Festival of Prints paper stack, also from the Holiday Catalogue.
Cheers,
Genna
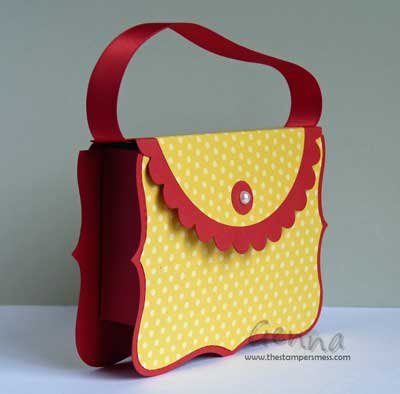
Top Note Handbag thankyou for the teachers!
With two boys in primary school I now have two teacher gifts to make at the end of the year. We’ve been very lucky and I’ve been super impressed with all the teachers the boys have had so far. They are so dedicated and go above and beyond what is required of them. A big thanks to all teachers everywhere, you are very much appreciated.
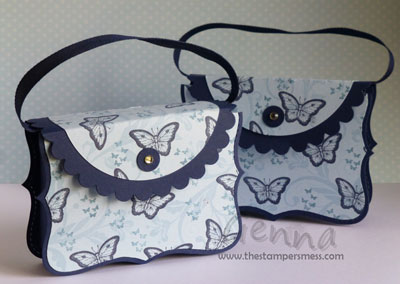
Here are the gifts I made for Sarah and Anita this year (yes, at the boys’ school teachers can choose to go by first names if they prefer):
THE PRINTABLE PHOTO RECIPE CARD IS AVAILABLE TO MY NEWSLETTER SUBSCRIBERS. Subscribe for free today and let me know you’d like this one.
These cute little handbags are made using the Big Shot with the Top Note, Circle & Scallop Circle dies. They look great but are actually pretty easy to put together when the die-cutting has been done for you. It’s hard to tell from the picture but I used a combination of Night of Navy and Bashful Blue cardstock. The stamps are from Papillon Potpourri, Make A Cake (love those tiny butterflies) and Flowering Flourishes.
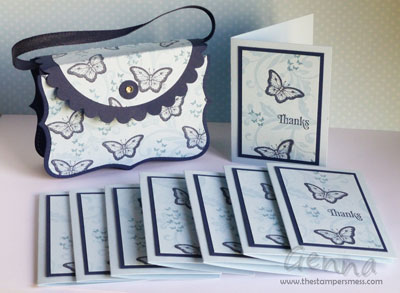
I’ve made these gift bags before and put chocolates in them but this time I decided to make a set of eight Thank You cards instead. I sized them to fit inside the bag and then decorated with the same stamps and colour scheme. Now the teachers will have some handy cards to give when they have Thank You’s of their own.
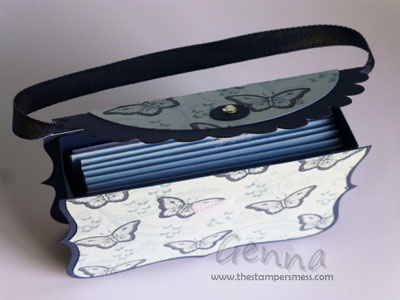
And here’s a look at the bag with all the cards fitting snugly inside. I also put in a couple of recipes for yummy treats that the boys have made and brought into class to share – Triple Chocolate Brownies and White Chocolate Cupcakes! Yum.
These bags are one of the projects I’ve done with my 3D Template Stamp Club recently. For them we used the same colour scheme but the stamping was slightly different:
And here’s another version using patterned paper instead of stamping:
Cheers,
Genna
Gifts made by my boys!
I guess it’s not really surprising that both my boys like to make their own cards and gifts to give to their friends. And especially at Christmas time! Both Zane & Devon were starting to receive cards and candy canes from their classmates so asked if I could help them make something to give out in return.
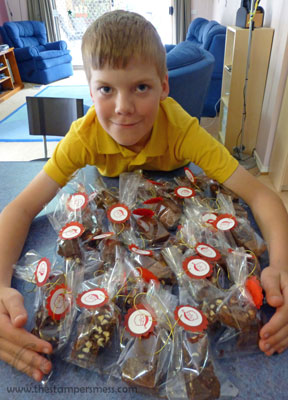
Devon had a class party with lots of yummy treats but Zane’s class went on a special trip instead. He didn’t want to miss out on the yummy Triple Chocolate Brownies that Devon made for the party so he made up another batch and decorated little bags with stamped labels and ribbons. It was a huge hit and we got lots of requests for the super easy recipe!
Here’s Zane with his batch of brownies all dressed up and ready to go!
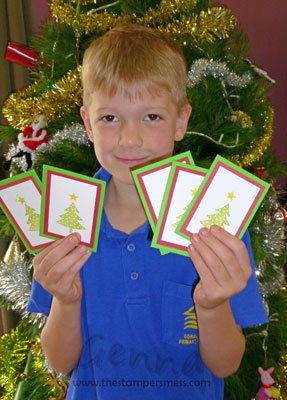
Devon went the more traditional route and made some great Christmas cards. Here he is with just a handful of the stack he made. It was so fun to watch him grow in confidence and see him notice his stamping improve as he worked his way through the production line!
I’m so proud that they’re both such creative, caring, sharing and giving boys!
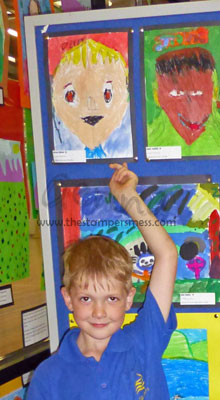
And speaking of proud, Devon was so excited to show me that his self-portrait made it into the school art show. And I was so impressed at how good it was I just had to share!
Cheers,
Genna
Christmas Pop-Up card and Star Box
We’re halfway through the 8 months of my first ever 3D Template Stamp Club and we’ve been having a ball making all sorts of 3D projects like boxes, shaped cards, cards that pop and move and surprise.
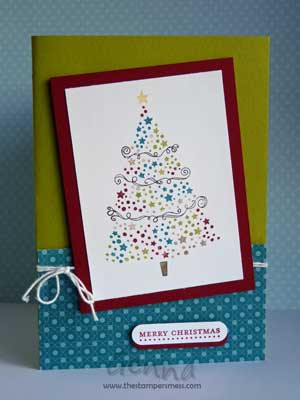
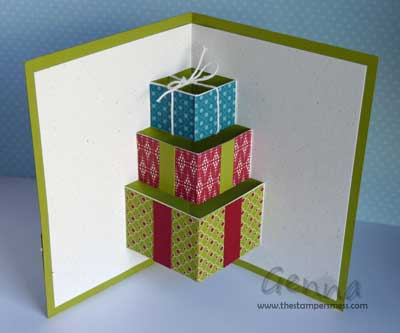
Recently we’ve been getting into a festive mood and creating a few Christmas projects. Last month we made this Present Pop Up Card.
Here’s the tree…
And if you look under it you’ll find…
…Presents!
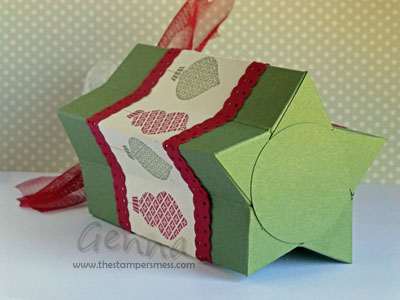
This month we made a festive box for yummy treats or little trinkets:
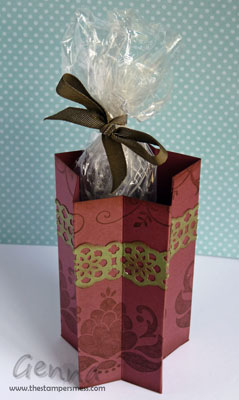
This versatile little star shaped box is made with the help of the Simply Scored scoring board and the Ornament Keepsakes stamp set.
And just to show that it doesn’t have to be for Christmas, here’s a version I made for a class earlier in the year:
Cheers,
Genna
A guitar cake for a Rockin’ Birthday
Although not related to Stampin’ Up! at all, another of my creative endeavours is birthday cakes for my boys. My mum always made us a special cake for our birthdays and my sisters and I have all carried on the tradition. A childhood birthday just isn’t a birthday without a homemade themed cake.
I am certainly not up to professional standards but I have fun with it and a birthday eve is usually a late one for me as I try to make the idea in my head out of cake and icing. Part of the joy and the frustration is that you only get one shot. There have been plenty of times where hindsight would be very useful but I’m yet to make the same style of cake twice so it’s all just wishful thinking.
For Devon’s recent birthday he wanted a Rock Star theme – due to an obsession with Reece Mastin. So what cake do you make for a Rock Star….

I found a fantastic mud cake recipe that was so easy to cut and hold its shape. The icing was a bit of a challenge – I tried marshmallow frosting for the first time and found it difficult to roll very thin and to blend the edges. Several of the design features were added at the last minute to cover ugly joins! And when it was done I had no idea where to put the candles so they ended up off the cake entirely.
Here’s the birthday boy all dressed up to match his cake!
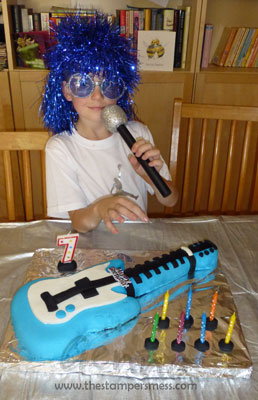
Happy 7th Birthday Devon!
Cheers,
Genna
Door Cards for The Stampers Next Door
As a demonstrator, when you start to grow a small team you can earn the right to give your team a name. I struggled with this a bit and it took me more than a year after I became entitled to choose one to actually give my team a name. I wanted it to be right. It couldn’t be too corny but I wanted it to have a down to earth and welcoming vibe too.
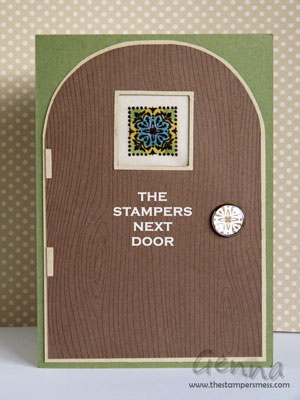
In the end I called my team The Stampers Next Door.
There are several reasons for the name. It fit my selection criteria, and it just so happens that my team does most of their stamping in the house next door to mine – which is owned by my in-laws. It just seemed to fit and I’ve been really happy with it.
So, I thought it would be appropriate to make a few cards in the team’s honour.
This is the first door card I made and it was initially to put in the header for my team newsletter.
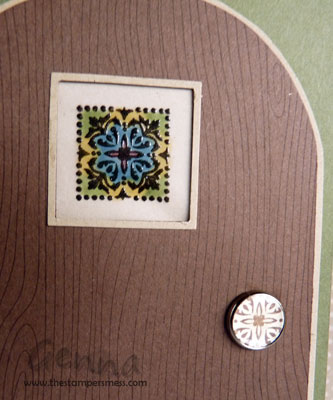
This is a close up of some of the door’s key feauters, a ‘stained glass’ window and a ‘build-a-brad’ handle.
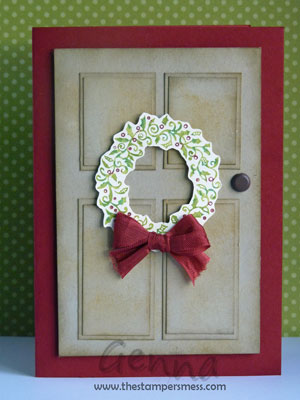
These next two doors were made during the creative process for my Christmas in July class this year. I loved them both, but only the first one made it into the class projects.
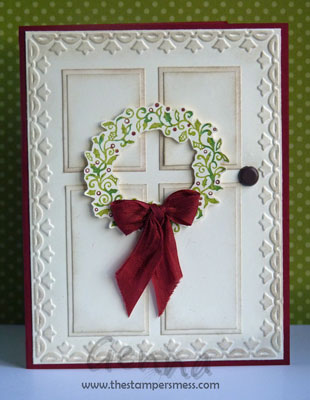
This last one is my favourite…for now. I have a few ideas for others so look out for more in the future.
I would love my team members to get creative with some door cards too but so far I haven’t been able to convince any of them. So I thought I’d throw the idea out there and if anyone reading this would like to give it a go I would love to see what you come up with. It can be any size, shape and style, it just needs to resemble a door of some sort.
Cheers
Genna
123 Cheese Photo Book
His awesomeness loves looking at photos of himself, and so do our boys. So it’s no surprise that we’ve been getting photo books printed for years. Some for us, some for family, including those on the other side of the world. We had some 123 Cheese vouchers recently and were trying to decide what albums to make when it hit me that I would like one for myself. This was a big shock to everyone, I can tell you, because unlike the rest of my family I do not get pleasure from looking at endless photos of myself.
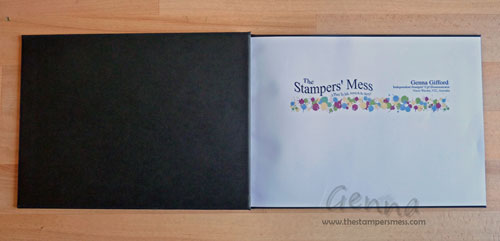
No, my idea was to create an album of my Stampin’ Up! creations. I have overflowing sample boxes but some of my favourite cards are ones that I’ve given away and I wanted to have some way to show the photos even if I no longer have the cards. I was absolutely thrilled with the results. The software was easy to use and even let me customise a title page to match my blog:
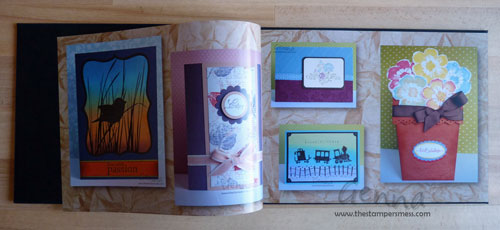
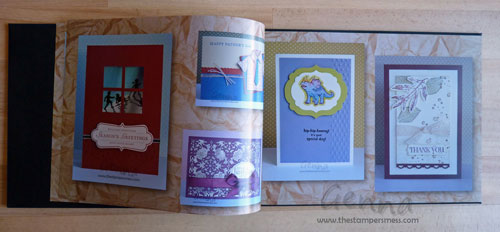
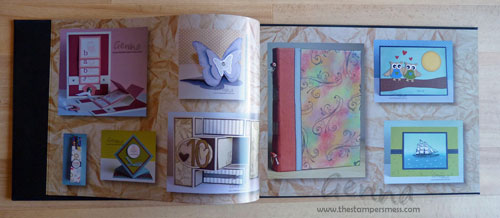
Then it was just a matter of sorting through all those photos and working out which ones to include:
And I love that one of the pre-loaded backgrounds looks just like all the brown packing paper that accompanies every order from Stampin’ Up!
The book looks so professional, with it’s lovely hard cover and so many lovely glossy pages. It makes my creations look amazing.
I love flicking through my album and have it out at most events so make sure you ask to see it if you don’t spot where it is when you’re over here.
I’m looking forward to making up more in the future.
Cheers
Genna
Stamp off to get more from your ink pads!
I love Stampin’ Up!’s range of colours but I know it’s not always possible for everyone to have them all. And even if you do, that’s only 50 colours to choose from – and everyone can always use more colour in their life!
Did you know there’s a way to get even more colours for your crafting without spending any more money? How? By using a technique called Stamping Off.
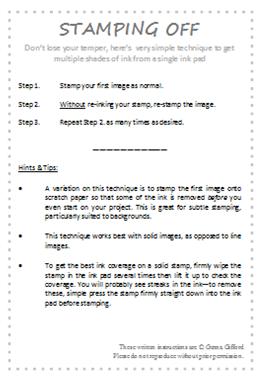
Whenever I do a workshop I like to give all the guests at least one little instruction card to take home with them as a reminder of the techniques they’ve learned. This is especially helpful for new stampers but even the experienced ones love the visual record because they can stamp their own samples on the other side.
Here’s an example of my ‘Stamping Off’ instruction card with the sample side stamped:
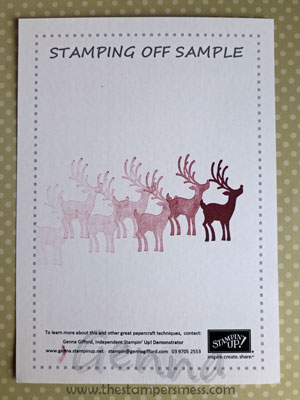
I love how good the little reindeer from Joyous Celebrations (page 7 of the Holiday Catalogue) looks when he’s been stamped off.
In this sample I simply inked up the reindeer with Bravo Burgundy ink and then kept on stamping without re-inking. Each time I stamped a reindeer friend he was a slightly different colour to the last. I could also have stamped a bit more randomly so that it looked like a group of different coloured reindeers and not a group lined up from light to dark but I didn’t think of that at the time.
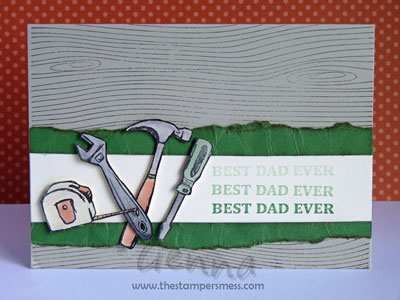
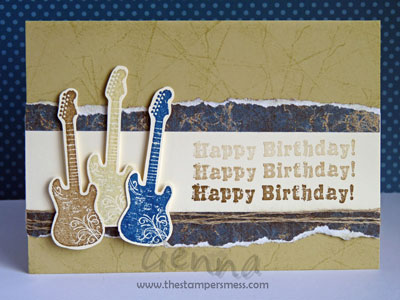
I particularly like the look that Stamping Off gives to greetings, so here are a couple of samples:
This one uses the now retired Totally Tools, but the greeting is from Best Dad Ever, which is still available (page 27), and it’s stamped in Garden Green.
And all these stamps come from the sadly retired Grunge Rock. This time I stamped in Soft Suede.
While I love the look of the fading colours, you can also use this technique to just deliberately stamp with a colour a few shades lighter than the ink pad is intended to be. If you have a colour that’s just too intense for your project then stamp it off onto scratch paper once or twice first, then stamp normally. Each time you need to add ink, just stamp it off before stamping on your project and you’ll consistently get the lighter colour.
I’d love for you to give this technique a try and don’t forget to show me the results.
Cheers
Genna
The FREE RIBBON is just perfect for Christmas
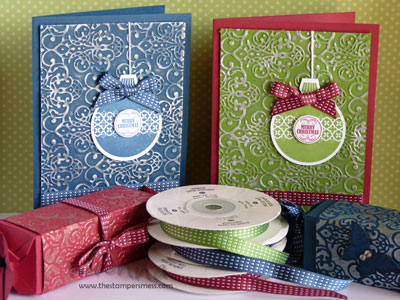
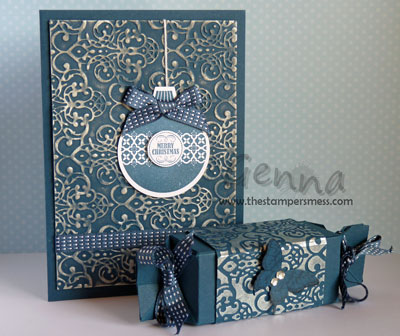
I’ve been playing with my FREE ribbon from this month’s promotion – read this post to learn how you can get yours. And when a recent hostess asked if we could do some sparkly Christmas cards I knew it would make the perfect embellishment – see how well the white stitching picks up the sparkle from the shimmer paint!
I’ve been really surprised at how well these three new In Colours (Midnight Muse, Gumball Green & Raspberry Ripple) work for my Christmas projects – they’re so much brighter than my usual choices but oh so festive!
As well as the In Colours and the ribbon, the workshop showcased different ways of using shimmer paint and featured projects made with the help of the Big Shot.
THE PRINTABLE PHOTO RECIPE CARD IS AVAILABLE TO MY NEWSLETTER SUBSCRIBERS. Subscribe for free today and let me know you’d like this one.
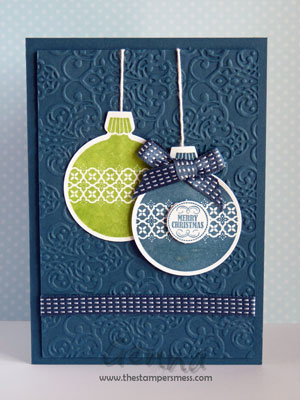
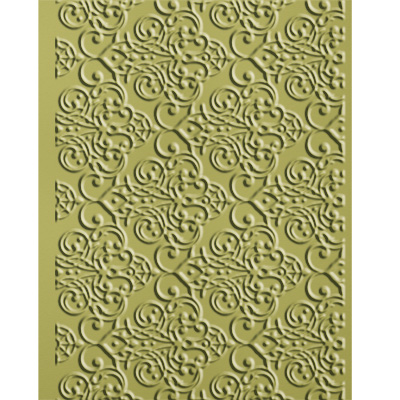
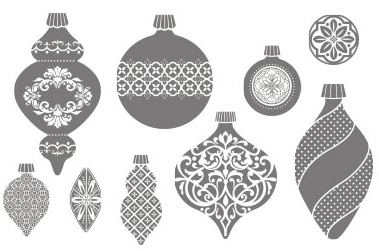
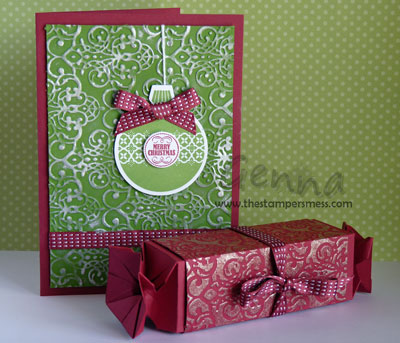
This is the straightforward version of the make and take card. We used lots of products from the Holiday Catalogue, such as the Lacy Brocade embossing folder and the Ornament Keepsakes stamps and framelits bundle.
Lacy Brocade Textured Impressions Embossing Folder $13.95
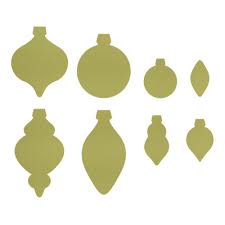
Ornament Keepsakes Wood $60.95 or Clear $48.95
Holiday Ornaments Framelits Collections $42.95
OR BUY THE STAMPS AND THE FRAMELITS AS A BUNDLE AND SAVE 15%!
THE PRINTABLE PHOTO RECIPE CARD (card only) IS AVAILABLE TO MY NEWSLETTER SUBSCRIBERS.
Subscribe for free today and let me know you’d like this one.
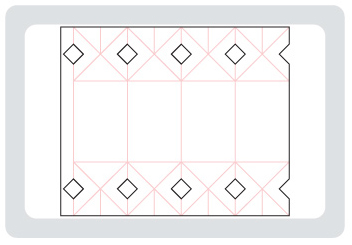
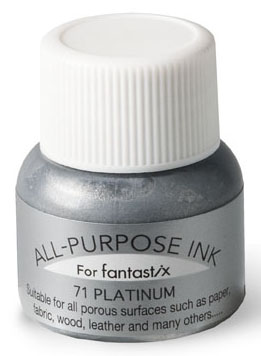
This time the sparkle was stepped up by adding Platinum Shimmer paint with a sponge dauber. And the matching Bon Bon was made using the Candy Wrapper Bigz die with a sleeve of embossed cardstock brayered with Frost White shimmer paint.
Candy Wrapper Bigz Die $55.95
Shimmer Paint 14g $9.95 (Platinum, Frost White or Champagne)
THE PRINTABLE PHOTO RECIPE CARD (card only) IS AVAILABLE TO MY NEWSLETTER SUBSCRIBERS.
Subscribe for free today and let me know you’d like this one.
And finally, here’s a Gumball Green/Raspberry Ripple version to show off the multicoloured look.
Would you like to host a workshop featuring these projects where you and your friends get to make a card like these to take home?
Contact me now to book your date. And if you like what you see don’t forget to leave me a comment.
Cheers
Genna
Waterfall Cards
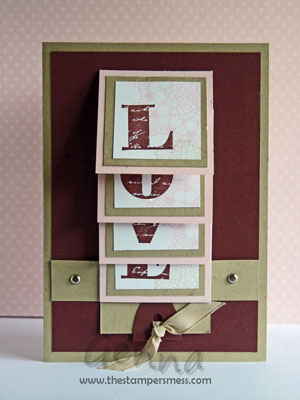
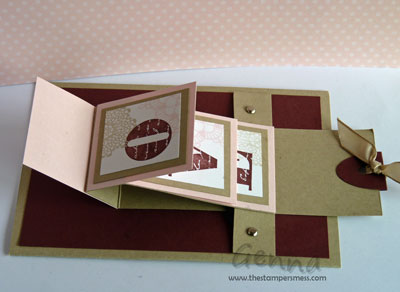
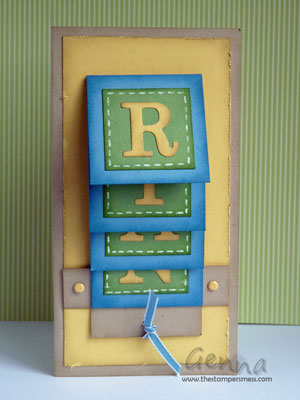
At my 3D Template Stamp Club this week we made a Waterfall card. These interactive cards are so much fun to make. But so difficult to show you in a photo!
The idea is that you pull the tab at the bottom and each of the four panels flip over in turn to reveal a hidden message or images.
Hopefully this picture gives you some idea and you can see that the letters L.O.V.E are being revealed one by one.
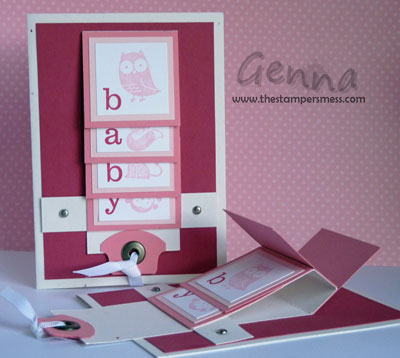
And here’s another version that I sell at my market stalls. I have the blue variety too!
And this card was made for a little boy called Ryan – can you guess what’s revealed when the panels flip over on this one?
If you’d like to learn how to make 3D projects like these every month I’m looking for interest in a new 3D Template Stamp Club. Contact me now to express your interest in one of the 8 places.
Cheers
Genna
Sweet Pressed Cookie Stamp Launch Goodies
I have to start this post with an apology to everyone who came to the Thursday night launch – you missed out on these….
I ran out of time for baking for the first event and even though Wonder Husband did a wonderful thing to try and make up for it, it wasn’t quite the same. I mentioned to ‘his awesomeness’ that I hadn’t made the cookies so he took it upon himself to look up a recipe for plain cookies, whip up a batch and deliver it once the launch was underway. A lovely, lovely thing to do indeed but what he hadn’t realised was that the whole point of baking the cookies was so I could try out the new cookie stamps! Oh well, his cookies were delicious – if a little less attractive than I’d intended!
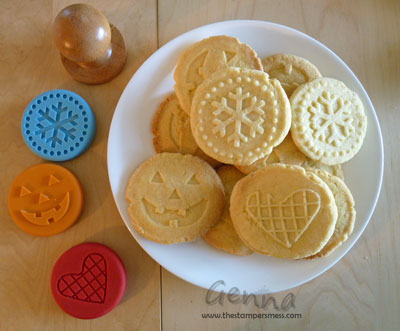
My lovely cookies only made an appearance at the Sunday launch. They’re made with the new Sweet Pressed Cookie Stamps! I used the Sugared Shortbread recipe included in the pack and the ‘Holidays’ set of cookie stamps.
They were delicious and so much fun! Not to mention super easy – once I made up the dough all I needed to do was roll it into balls and then ‘press’ with the cookie stamps before baking. How cool is that!
You can spend a bit more time and roll the dough into sheets, press the stamp into the dough and then cut out with a round cutter for perfect edges. But who needs perfect edges when they’re so delicious they need to be sampled straight away!
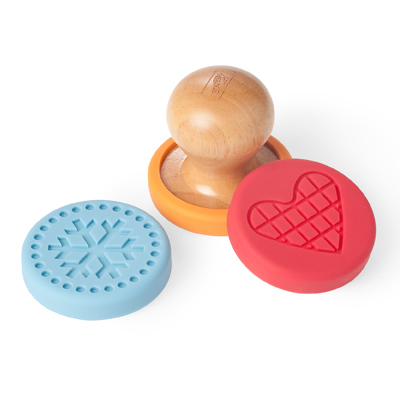
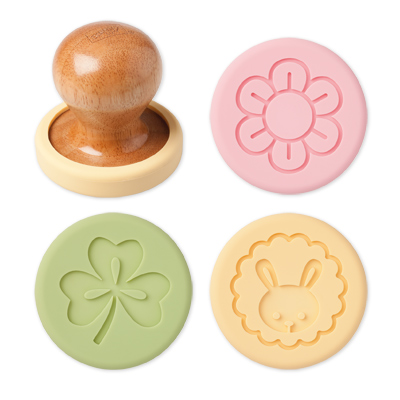
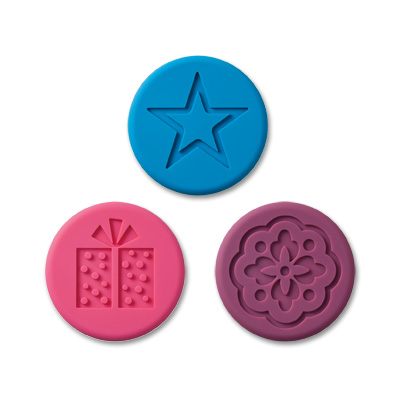
Each set of stamps comes with 3 silicone stamps and a wooden handle. Everything is food safe and easy to clean. And only $29.95!
‘Holiday’ Sweet Pressed Cookie Stamps – that’s the Jack-o-lantern image loaded onto the wooden handle!
‘Occasions’ Sweet Pressed Cookie Stamps . (There’s three in this set too – the bunny is on the handle this time)
And the ‘Special Events’ Sweet Pressed Cookie Stamps!
Papillon Potpourri and Elegant Butterfly Free Mini Card
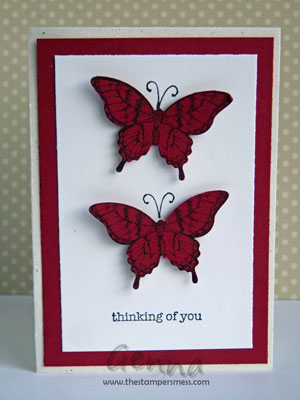
This is the free mini card you can make at my Catalogue launches – so even if you choose not to partake of the Card Buffet you can still go home having made a card.
This card is half the size of a normal A5 card and can be made in any of the five new In Colours.
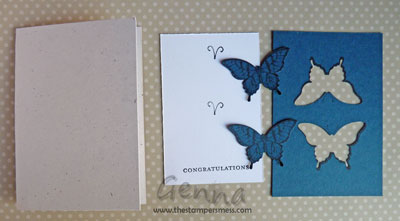
And just in case you don’t make it to the launch, here are the basic steps:
- Stamp two butterflies in black ink on the coloured cardstock of your choice
- Punch them out.
- Stamp antenna and a greeting on white cardstock.
- Stick butterflies onto white cardstock with dimensionals.
- Mat your white panel on matching colour cardstock.
- Adhere to the mini card base.
- So easy!
HERE’S A TIP!
Stamp your butterflies in the middle of your mat. Once you’ve punched them out and covered them up with the white cardstock no one will ever know and you’ve saved yourself some cardstock!
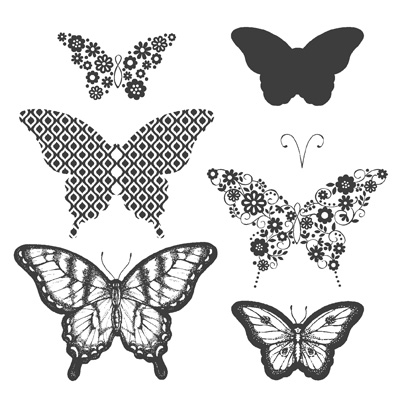
Papillon Potpourri Wood $32.95 or Clear $25.95
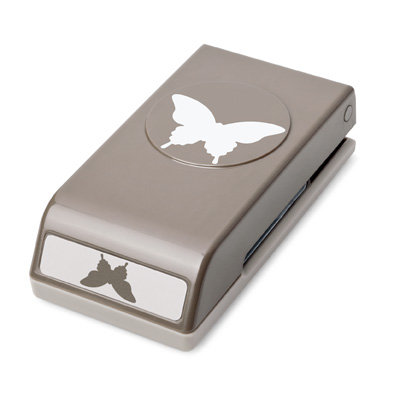
Elegant Butterfly Punch $27.95
If you’d like to come to my launch on Sunday 23rd September let me know. It’s any time from 2pm – 6pm but bookings are essential. See the previous post for more details.
And if you’d like to order the stamps or the punch it’s as simple as sending me an email. You don’t have to be at an event to order and everything can be shipped straight to you for just $5.95 or 5% – whichever is greater. And…if your order is over $300 you’ll also receive hostess benefits even if you haven’t actually been a hostess.
Cheers
Genna
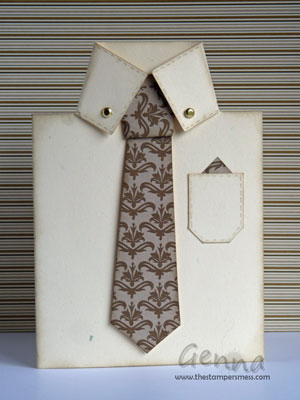
Shirt & Tie cards for dads
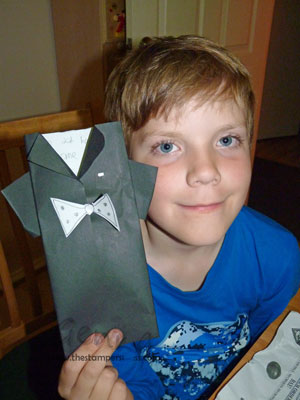
I was making some of these Shirt & Tie cards to sell for Fathers’ Day while at my new market in Endeavour Hills recently when my family dropped by to visit. I didn’t think my boys were actually taking much notice of what I was doing – the free fairy floss, popcorn and jumping castles were more of a drawcard! But a week or so later I discovered that Zane (9) had felt inspired to make his daddy a Fathers’ Day card and this is what he came up with all by himself!
Zane told me he saw what I was making and knew Daddy likes to get dressed up so this is what he made. The idea, design and the making were all Zane – and I’m so proud of him!
In fact I was proud of both my boys who were so excited about giving Daddy a special day they could hardly sleep. Instead of going to bed they hid in their rooms and made presents and plans for a party that they put together for when we got up the next morning. They made signs and decorations, even Daddy-specific party games. They wrapped handmade presents and others proudly bought at the stall at school. I loved seeing them so engaged with the idea of giving and showing their dad that they love and appreciate him. We must be doing something right!
If you like the cards or this post, make my day and leave me a comment!
Cheers
Genna
Totally Tools for my dad
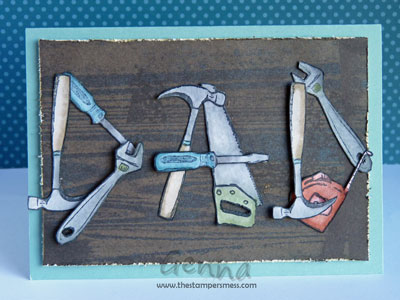
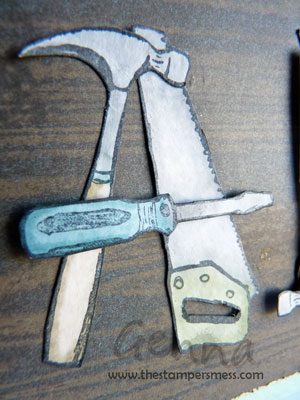
Although the fabulous Totally Tools set is now retired I’d never actually used it to make my own dad a card. Considering this is the man who built his own impressive home – despite not being a builder or any form of tradie – I thought I probably should. So here’s the card I made for him for Fathers’ Day this year. It’s my take on the ‘spell it with shapes’ cards that have inspired me all over the place.
THE PRINTABLE PHOTO RECIPE CARD IS AVAILABLE TO MY NEWSLETTER SUBSCRIBERS. Subscribe for free today and let me know you’d like this one.
I did a one-off market night at Koo Wee Rup last week and spent my time in between chatting and serving customers colouring and cutting all the tools out.
And here’s a close up of those tools, all watercoloured with Stampin’ Write markers and an Aquapainter. I love how the Basic Gray marker is just perfect for the metal parts. And although all the fussy cutting can take a while I find it really relaxing!
Farewell Totally Tools!

Totally Tools – retired
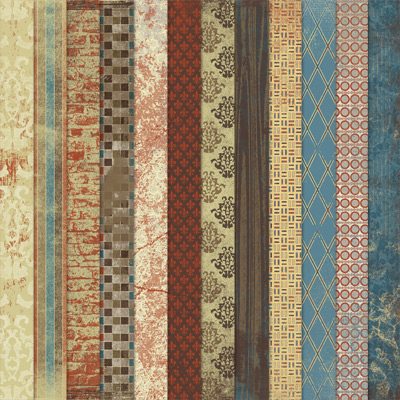
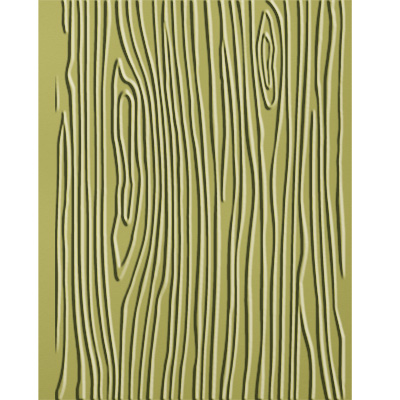
And in case you’re wondering that woodgrain background came from the sadly also retired Well Worn Designer Series Paper pack. This was the first retiring DSP to sell out. It was hugely popular and wonderful for those tricky masculine cards.
Well Worn DSP – retired
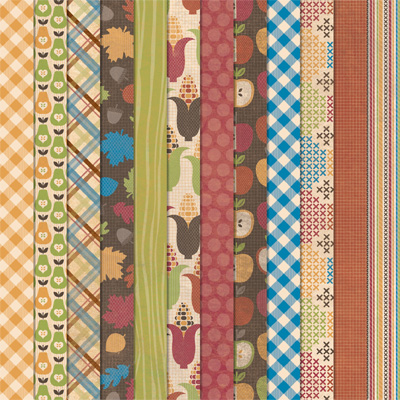
While I’ll live with the very remote hope that it will one day return to the catalogue, I was heartened to discover that one of our new DSP packs contains woodgrain images:
Orchard Harvest DSP – $18.95 in the Holiday Catalogue
(12″ x 12″ sheets – 2 each of 6 double-sided designs)
And, if that’s not good enough, we also have a choice of other woodgrain products:
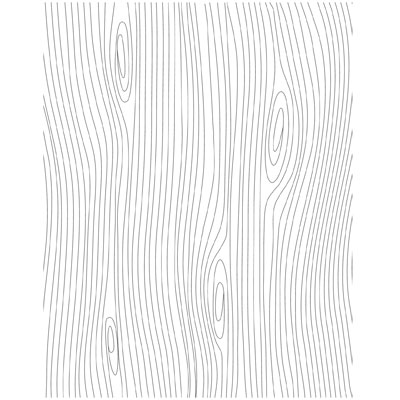
Woodgrain Background Stamp (Wood) $30.95
Woodgrain Textured Impressions Embossing Folder – $13.95 in the Holiday Catalogue
(for use with the Big Shot or other die-cutting machine)
Timber Stampin’ Around Standard Wheel – $10.95 in the Holiday Catalogue
(handle sold separately for $6.95)
So I guess those ‘woodworkers’ out there aren’t going to be disappointed at all!
If you like my card or this post, make my day and leave me a comment!
Cheers
Genna
Punch Art Bear for Daddy
It’s about time my new blog showed some of my creations, don’t you think!
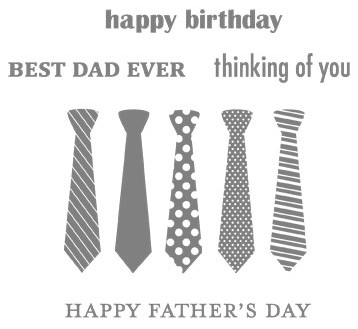
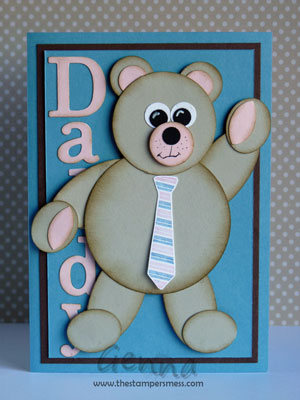
I’ve wanted to use the ties from the stamp set Best Dad Ever on punch art since I first saw them. And this Fathers’ Day was my chance. I inked the striped one with markers and cut it out to add to the ‘Daddy’ bear card for ‘his awesomeness’, my Wonder Husband.
Best Dad Ever (Wood) $32.95 (Clear) $25.95
The bear was made using various Stampin’ Up! Circle and Oval punches. I’m really proud of this and so pleased because I didn’t go looking for inspiration first. I knew I was making a bear and just kept punching out shapes and rearranging, sponging, changing colours, etc. until I was happy with him. My big tip for ALL punch art projects is to sponge ink onto the edges of your shapes – it really does make a huge difference to how lifelike your creations look.
It’s also amazing how different he can look just by the placement of eyes, ears etc. And it’s funny but the skinnier versions looked younger too – even though all I was changing was the size of the main body! But doesn’t he look so huggable with his big round belly!
THE PRINTABLE PHOTO RECIPE CARD IS AVAILABLE TO MY NEWSLETTER SUBSCRIBERS. Subscribe for free today and let me know you’d like this one.
The ‘Daddy’ letters were made using the now retired Timeless Type Alphabet Dies and my Big Shot. I had to use them because ‘Daddy’ and I had been talking recently about how much longer we’ll be Mummy and Daddy rather than Mum and Dad. Our boys are 9 and 6 so those days are probably numbered. Zane (9) recently announced that he would use the shortened forms because that’s what his friends do but he’s clearly forgotten about it and we’re not going to remind him!
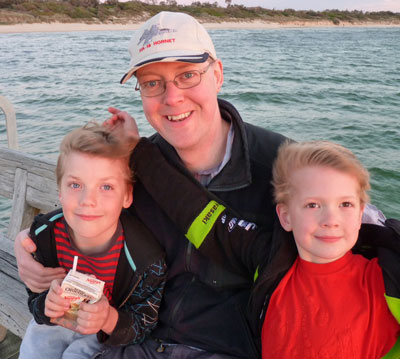
Fathers’ Day this past Sunday was wonderful – it’s the first time in four years that I haven’t been working a market stall and leaving ‘his awesomeness’ and the boys to entertain themselves. And it was glorious Spring weather so we headed out to Point Nepean for the day, had a thoroughly good time, exhausted ourselves and came home very happy and, in my case, just a little sunburnt!
This photo was taken at sunset at the end of a pier – hence the addition of warm jackets on what was a stunning sunny day!
If you like my card or this post, make my day and leave me a comment!
Cheers
Genna
Feeling good…
Well at long last I have my blog up and running. I’ve just had my fourth anniversary of being a demonstrator and I really wish I knew why I didn’t join blogland a long time ago. It feels great to have it here ready to go and I’m so excited to be able to share my Stampin’ Up! life with you. There’ll be posts about my creations, classes, events, thoughts, projects, products, specials, etc.
Please do come on the journey with me by checking in here regularly – or even signing up to the RSS feed or email subscription.
But starting a blog doesn’t mean my newsletter will suffer – it’ll still be there with exclusive content and bonuses. For starters, all new subscribers (and any older ones who ask) can choose a free tutorial just for signing up to get my regular e-newsletters. See the box on the right for more details.
And while the blog section is a little light on content just now I promise you that will change. In the meantime, I’m adding content to my pages constantly at the moment so go check them out via the menu buttons above.
And because I’m feeling so good about this new venture I thought I ‘d share a little video that really captures the way Stampin’ Up! makes so many people feel good. Enjoy.
If you like my blog or this post, make my day and leave me a comment!
Cheers
Genna
 Follow

